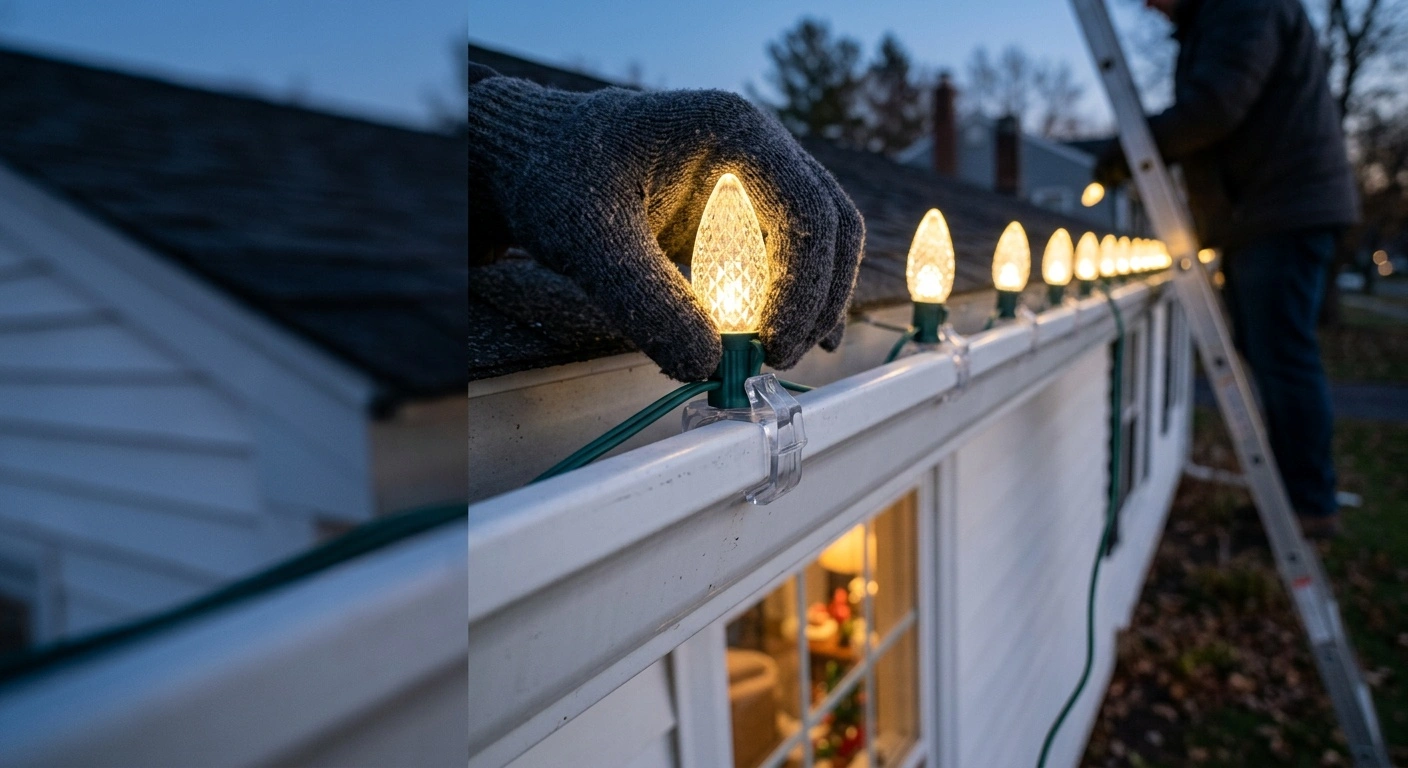
Christmas light clips hold holiday lights along gutters, shingles, fascia, windows, and railings without piercing the wire. Start by matching each clip to the mounting surface and bulb style. Then test the lights and install one short section at a time.
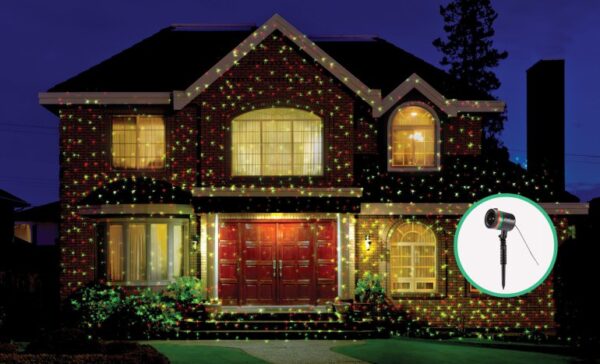
Most people can finish a basic one-story roofline in an afternoon. Peaks, columns, windows, and multiple levels require more time. If you cannot reach an area safely from a ladder, use a light projector or hire a professional installer.
A single clip style rarely works on every surface. A gutter clip may aim bulbs incorrectly on shingles. Likewise, an adhesive clip may fall from rough brick, damp wood, or textured siding.
- Skill level: Beginner, with safe and confident ladder use
- Time needed: One afternoon for a simple one-story roofline; longer for detailed displays
- Approximate cost: Low for basic plastic clips, depending on display length and specialty hardware
Choosing the Right Christmas Light Clips
Match the clip to the mounting surface before considering its appearance. Gutter clips hook over a suitable gutter lip. Shingle clips slide carefully beneath an accessible shingle edge without lifting or damaging the roofing material.
Magnetic clips require steel or another magnetic metal. They will not grip aluminum, vinyl, or many stainless steel surfaces. Test the mounting area with a household magnet before buying the clips.
Adhesive clips work best on clean, smooth surfaces. Dirt, moisture, peeling paint, porous masonry, and rough siding weaken the bond. Check the manufacturer’s temperature and curing requirements before installation.
The bulb and wire style also matter. C7 and C9 clips support the socket and control the bulb’s direction. Mini-light clips usually hold the wire or the small base near each lamp.
For icicle lights, support the horizontal supply wire without crushing it. Space clips closely enough to keep the hanging sections from bunching in the wind.
All-in-one clips can help when a run crosses compatible gutters and shingles. However, “universal” does not mean suitable for every roof or bulb. Test several clips on the house before buying enough for the full display.
| Clip type | Best use | Main advantage | Watch for |
|---|---|---|---|
| Gutter clips | Open gutters with a suitable lip | Quick installation and consistent bulb alignment | They may not fit gutter guards, rolled edges, or unusual profiles |
| Shingle clips | Accessible asphalt shingle edges | Useful where no gutter is available | Never force them under sealed, brittle, or frozen shingles |
| All-in-one clips | C7, C9, and some mini-light runs | One style can fit several common applications | Confirm the listed bulb and surface compatibility |
| Adhesive clips | Smooth window frames, finished trim, and indoor surfaces | No drilling or visible fasteners | Dirt, moisture, cold surfaces, and texture can weaken the adhesive |
| Magnetic clips | Steel gutters, flashing, railings, and metal trim | Fast placement and removal | They will not grip aluminum, vinyl, or nonmagnetic stainless steel |
| Railing or deck clips | Railings, fences, and porch edges | No tape or permanent fasteners | The opening must match the railing’s shape and thickness |
| Suction-cup clips | Clean, smooth glass | Simple support for temporary window displays | Condensation and temperature changes can loosen the seal |
Tools and Materials
- Christmas light clips matched to the bulb style and mounting surface
- Outdoor-rated light strands listed by a recognized testing laboratory, such as UL or ETL
- Outdoor-rated extension cords, timers, and connection accessories
- A GFCI-protected outdoor outlet
- Tape measure or measured length of nonstretch cord
- Outdoor timer or suitable smart outdoor plug
- Extension ladder or stepladder rated for the required height and load
- Ladder stabilizer or standoff, when suitable for the house and ladder
- Work gloves with a secure grip
- Weather-resistant cable ties for limited strain relief away from bulbs and moving parts
- Reusable hook-and-loop ties, where suitable
- Listed outdoor connection cover, if the setup requires one
- Dry cloth and any cleaner recommended by the clip manufacturer
- A helper who can pass supplies and monitor nearby hazards
- Tool pouch or small container for carrying clips
How to Hang Lights With Clips
- Inspect every light strand and cord. Uncoil the lights on a dry surface. Look for frayed insulation, cracked sockets, corrosion, exposed conductors, crushed wire, and loose plugs. Discard damaged strands instead of covering defects with tape. Confirm that each product carries the correct indoor or outdoor rating.
- Test the lights from a GFCI-protected outlet. Plug in one strand at a time. Replace only user-serviceable bulbs or fuses, and follow the manufacturer’s directions. Check all lighting modes and test the timer before installation.
- Measure the mounting path. Measure gutters, eaves, windows, porch rails, and the distance to the outlet. Allow extra length for corners, transitions, and drip loops. Keep cords away from walkways and do not stretch them tight.
- Check the connection limit. Read the strand instructions to learn how many sets may connect end to end. This limit varies among products, including LED sets. Divide a large display into separate approved runs when needed.
- Test-fit a clip at ground level. Insert the socket or wire exactly as the clip manufacturer directs. Then test the clip on an accessible section of the mounting surface. It should hold firmly without pinching the wire, cracking, or shifting the roofing material.
- Arrange the strands in installation order. Place the plug end closest to the planned power source. Gently remove twists without pulling bulbs or sockets. Position connectors and controllers according to their instructions.
- Set the ladder on firm, level ground. Place an extension ladder at a 4-to-1 angle. Set the base one foot from the wall for every four feet of vertical height. Secure the top and keep both feet stable.
- Extend the ladder correctly when accessing an upper level. The side rails should extend at least 3 feet above the landing surface. Maintain three points of contact while climbing. Never use a helper’s grip as a substitute for proper ladder setup.
- Work from the power end outward. Attach each clip according to its directions. Seat the socket or supported wire section without yanking the strand. Use consistent spacing and add support at corners or transitions.
- Leave controlled slack at corners. Do not pull the wire tight or bend it sharply beside a socket. Place a compatible clip on each side of the turn. The clips, rather than the socket or plug, should carry the load.
- Support vertical drops and transitions. Use clips designed for siding, trim, railings, or other vertical surfaces. Keep cords away from doors, shutters, and operable windows. Secure each run so wind cannot swing it against the house.
- Protect the cord route and connections. Keep outdoor connections off the ground and away from standing water. Add listed connection protection when the setup requires it. Form downward drip loops so water does not follow the cable toward a plug.
- Inspect the display after dark. Look for crooked bulbs, dark sections, gaps, and sagging wire. Disconnect power before making adjustments. Move the ladder instead of leaning beyond its side rails.
- Program the operating schedule. Set an outdoor-rated timer to turn off the display while you sleep or leave home. Test a complete on-and-off cycle. Confirm the clock, photocell, or smart control follows the intended schedule.
Common Mistakes With Christmas Light Clips
Too few supports can leave a roofline sagging, especially with C9 sockets or icicle lights. Do not make long sections of wire carry the display’s weight. Plugs and connectors should never hang by their cords.
Inconsistent clip orientation makes bulbs point in different directions. Follow the same orientation along each straight section. Step back periodically and check the line from the yard.
Never force clips beneath sealed, brittle, or frozen shingles. Forcing them can damage the roof or snap the clip. If the edge does not open easily, choose a gutter, fascia, or specialty mounting option.
Gutter guards can also block standard gutter clips. Test the fit before buying a full package. Use a guard-compatible clip if the standard style cannot grip securely.
Adhesive clips often fail on dust, moisture, oxidation, or loose paint. Clean and dry the surface as directed. Follow all application-temperature and curing instructions.
Ordinary household tape does not provide dependable outdoor support. Cold, sunlight, and moisture can loosen it or leave residue. Also, leave slight slack so temperature changes do not strain sockets and wires.
Safety While Hanging Holiday Lights
Use outdoor-rated lights, extension cords, timers, plugs, and accessories for exterior displays. Look for a listing from a recognized testing laboratory, such as UL or ETL. Connect the display to a GFCI-protected outlet.
Never drive staples, nails, screws, or tacks through a light wire. Plastic clips support the strand without piercing its insulation. Even so, the clip must not crush or sharply bend the cord.
Follow the manufacturer’s end-to-end connection limit. Low-power LED strands still have product-specific limits. Do not assume separate outlets use separate circuits unless you know the home’s wiring.
Move the ladder often instead of leaning sideways. Keep your belt buckle between the side rails and maintain three points of contact. Stop working if rain, ice, snow, or strong wind makes the area unsafe.
Keep cords away from doorways, walkways, standing water, and snow-removal equipment. Keep bulbs clear of curtains, paper decorations, dry leaves, and other combustible materials. Turn off the display while sleeping or away from home.
Water a real Christmas tree daily if you use lights near it. Dry trees ignite quickly and create a serious fire hazard. Discard any strand with damaged insulation, sockets, or plugs.
Taking Down and Storing the Lights
Choose a dry day for removal. Disconnect power, then work in the reverse direction of installation. Release each clip by hand while supporting the wire.
Do not pull an entire strand down from one end. The sockets can strike the siding, gutter, pavement, or ladder. Yanking can also damage wires and reusable clips.
Follow the manufacturer’s instructions when removing adhesive hardware. Some products use stretch-release tabs, while others permit gentle warming. Do not pry clips from painted trim or glass.
Discard clips that appear cracked, chalky, bent, or weak. Clean reusable clips and let them dry fully. Sort them by surface type and bulb size in labeled containers.
Coil each strand loosely around a reel, cardboard form, or purpose-made holder. Avoid tight bends near plugs and sockets. Label the holder by location, such as roofline, porch, or front window.
Store the lights in a cool, dry area protected from pests and moisture. Do not place heavy items on the containers. Proper storage prevents crushed sockets and simplifies next season’s setup.
Keep the Display Straight and Secure
A clean roofline depends on the correct hardware and consistent support. Even bulb direction and controlled corners matter more than pulling every inch of wire tight. No plug, socket, or wire joint should act as an anchor.
Test a short section before covering the entire roofline. This step matters around gutter guards, unusual trim, and older shingles. Keep spare clips nearby because cold plastic can crack during installation or removal.
Check the display after strong wind, heavy rain, or snow. Reset loose clips only after disconnecting the power. If a mounting point requires force or an improvised fastener, choose a clip designed for that surface.