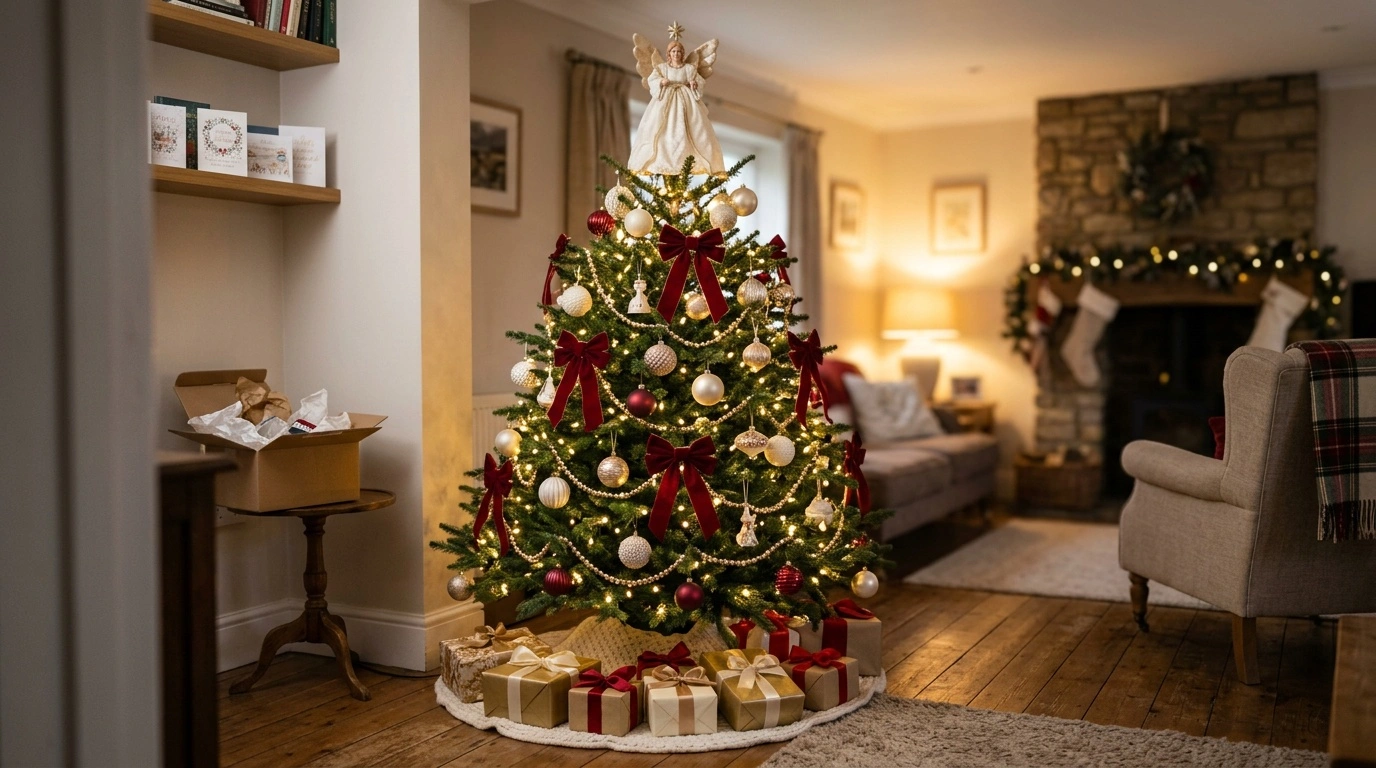
A Christmas tree angel topper gives the tree a clear focal point and adds a traditional symbol of peace and celebration. The right angel suits the tree’s proportions, repeats colors or textures below, and stays upright without bending the top branch.
Angel toppers suit formal, rustic, colorful, and modern decorating styles. However, many people choose by appearance alone. A large, heavy angel can overwhelm a slim tree, while a small figure may disappear above wide branches. Plan the full design first, then use the angel as the finishing piece.
How to Choose a Christmas Tree Angel Topper
Start with scale. Even a well-made angel looks awkward if its height and width do not match the tree. A tall, full tree can support broad wings and a fabric robe. A tabletop or pencil tree usually needs a narrow, lightweight design.
Measure the space between the treetop and ceiling before shopping. Include the angel’s halo, wings, or raised arms in your measurement. Leave enough room to prevent the topper from scraping the ceiling.
Weight matters nearly as much as size. Hollow figures, wire frames, and lightweight fabric designs suit many artificial treetops. Heavy ceramic, thick resin, and solid metal pieces need stronger support. If the top branch droops after installation, reinforce it or choose a lighter topper.
Check the mounting system before buying. Most angels use a cone base, spring, coil, clips, ties, or a combination of attachments. A wide cone may wobble on a sparse branch. By contrast, a narrow coil may not fit around a thick artificial stem.
Finally, choose an unlit, internally lit, or LED-outlined angel. Route a lighted angel’s cord down the back without pulling the figure sideways. Pair warm white tree lights with a warm white topper. Use cool white throughout for a crisp silver-and-white effect.
| Tree type | Topper style that usually works | What to watch for |
|---|---|---|
| Full traditional tree | Fabric-robed angel with medium or broad wings | Check the weight and ceiling clearance |
| Slim or pencil tree | Narrow angel with upright wings | Avoid wide robes that hide the upper branches |
| Tabletop tree | Small wire, paper, felt, or molded angel | Choose a very light attachment |
| Flocked tree | Ivory, champagne, silver, or natural-fiber angel | Avoid adhesives and rough clips that remove flocking |
| Tree with many family ornaments | Simple, lightweight angel in one repeated color | Keep the top visually simple |
| Modern tree | Minimal wire-frame, wood, or folded-paper angel | Choose a clean silhouette visible across the room |
Traditional Gold and Ivory
A gold-and-ivory theme creates a warm, formal setting for an angel. Use ivory, champagne, soft gold, and small touches of cranberry. Avoid mixing several unrelated metallic finishes. Warm white lights work well because cool bulbs can make cream fabric appear gray.
Choose an angel with an ivory robe, gold trim, and wings that stand out against the wall. Repeat those materials with satin balls, glass ornaments, velvet bows, and gold beads. Place a few reflective ornaments deeper in the branches to add depth.
A gold floral pick or starburst ornament can connect the topper to the upper branches. Keep those accents away from the angel’s face and wings. The crown should look balanced rather than crowded.
Finish with an ivory skirt, a gold-edged collar, or a plain neutral fabric. For a lower-cost update, keep existing ornaments and add gold ribbon or handmade paper fans. You can refresh an older angel with a new sash. Keep added fabric clear of bulbs, vents, plugs, and electrical parts.
Woodland and Rustic Angels
A rustic angel looks convincing beside natural textures and muted colors. Build the palette around warm white, brown, evergreen, muted red, and small amounts of aged gold. Burlap, cotton ribbon, wood ornaments, pinecones, felt shapes, and faux berries add useful texture.
Choose a linen, twig, wood, or natural-fiber topper with a clear outline. Simple wire, woven, or pale wood wings work well. Make sure the branches do not obscure the silhouette.
Use warm white lights and tuck them slightly inside the branches. This placement creates depth instead of exposing a hard grid of bulbs. A woven tree collar grounds the design. A plaid blanket also makes an inexpensive skirt if it stays clear of plugs and connections.
For homemade ornaments, tie rust-colored ribbon around pinecones or cut stars from heavy kraft paper. You can also make small bundles from artificial greenery. Keep dried plant material away from hot or damaged lights. Avoid loose straw that could fall into electrical connections.
A lightweight cardboard or wire angel covered with fabric scraps offers an affordable topper option. Keep homemade toppers unlit and away from bulbs. They should never pinch or trap electrical wiring.
Modern White, Silver, and Glass
A modern angel tree relies on repetition instead of many ornament shapes. Use white, clear, silver, and one dark accent such as navy, charcoal, or deep green. Cool white lights sharpen this palette. Warm white bulbs create a softer effect with champagne-toned silver.
Look for a Christmas tree angel topper with a simple outline, restrained wings, and minimal surface decoration. Wire-frame, folded-paper, translucent, and smooth molded angels suit this style. Heavily layered robes and lace can make the crown look busy.
Combine matte balls with a smaller number of clear or reflective ornaments. Leave enough open space for the branches to show. Use narrow vertical ribbon instead of thick wrapped garland, which can make a slim tree look banded.
A plain white, gray, or dark green skirt keeps attention on the tree’s outline. A simple metal or woven collar adds structure. For a low-cost topper, use white card stock, translucent paper, or thin craft wire.
Do not spray-paint a lighted topper or any electrical component. Secure an unlit homemade angel with removable ties. Keep paper and wire away from bulbs and exposed connections.
Colorful Family Keepsake Style
A family tree filled with collected ornaments needs a welcoming angel that does not compete with every color. Choose an ivory, warm gold, white, or natural wood topper. Repeat that neutral in ribbon or several larger ornaments.
Colored lights suit a playful collection. Warm white lights make mismatched ornaments feel more unified. Either choice works when you distribute the colors evenly around the tree.
Place large, sturdy ornaments deeper in the branches. Reserve fragile keepsakes for visible areas away from busy walkways. Paper chains, felt garland, painted wood shapes, and children’s ornaments can share the tree without looking cluttered.
A fabric-robed angel often suits this informal display. Its soft shape pairs well with handmade pieces. Avoid adding too many floral picks or large ornaments near the crown.
Use a washable tree skirt, quilt, or sturdy cotton blanket in homes with children or pets. Adults should handle cutting and hot glue for homemade toppers. Keep hooks, small parts, and button or coin batteries away from children. Secure every battery compartment.
Victorian-Inspired Cranberry and Lace
This style uses rich red, antique-style gold, cream, and layered fabric. Warm white lights flatter cranberry velvet, lace, tassels, and aged metallic finishes. Choose an angel with a long robe or detailed wings. Leave open space around it so the branches do not hide the details.
Use velvet bows, pearl-style beads, small bells, fabric roses, and glass-look ornaments in measured amounts. Repeat the same cranberry ribbon from top to bottom. This simple pattern keeps detailed decorations from appearing scattered.
An ivory or deep red tree skirt completes the base. Choose trim that repeats part of the angel’s robe or wings. That connection helps the topper feel integrated with the full tree.
For a lower-cost version, fold cream paper doilies into ornaments and add red fabric bows. Group secondhand ornaments by color rather than age or origin. Narrow ribbon can also update plain plastic balls without permanently changing them.
Keep loose paper, fabric, and lace away from incandescent bulbs. Check sockets and cords before decorating. Discard lights with damaged sockets, cracked insulation, or exposed conductors.
Celestial Blue and Gold
A blue-and-gold tree creates a quiet nighttime setting for an angel. Use midnight blue, soft gold, cream, and clear glass. Add a few small stars throughout the branches.
Warm white lights keep the gold rich and soften the blue. Cool white lights sharpen the blue and create an icier appearance. Choose one light color and repeat it throughout the tree.
Select an angel with gold wings, a cream robe, or a restrained blue sash. Mix matte navy balls with reflective gold ornaments, translucent drops, and textured ribbon. Use smaller stars below the topper so the angel remains the main focal point.
A navy skirt makes the lower branches appear fuller. A cream skirt brightens a dark corner. For an inexpensive update, cut stars from metallic paper and make navy ribbon bows.
A lightweight folded-paper angel can work on a small tree. Keep it unlit and away from bulbs, plugs, and electrical connections. Secure it with removable ties rather than staples.
Shopping List for a Coordinated Angel Tree
Plan purchases from the top down, even though you will decorate from the lights upward. This approach keeps the angel’s scale, color, and finish central to the design. Measure the tree, ceiling clearance, and upper stem before shopping.
Choose one main color, one supporting color, and one or two finishes. Useful finishes include matte, glass-like, velvet, metal, and natural wood. You may only need ribbon and a few repeated accents to unify existing ornaments.
- Angel topper: Choose a lightweight figure with a base that fits the upper stem. Reuse an existing angel with a new sash, or make an unlit paper, felt, or wire version.
- Lights: Select warm white, cool white, or colored lights to suit the theme. For a budget approach, use safe working strands you already own and plan the palette around them.
- Garland or ribbon: Repeat one material throughout the tree. Cut wired ribbon into branch-length pieces instead of wrapping the entire tree.
- Base ornaments: Use plain balls to establish color and fill gaps. Group mismatched ornaments by color, or tie them with matching ribbon.
- Feature ornaments: Add stars, keepsakes, wood shapes, floral picks, or glass-look drops. Paper, salt dough, felt, and fabric can replace specialty ornaments.
- Texture: Include velvet, lace, wood, metal, clear materials, or natural-looking accents. Fabric scraps, pinecones, folded paper, and leftover ribbon offer inexpensive options.
- Tree skirt or collar: Repeat a color or material from the topper. Keep blankets and fabric remnants clear of the stand, cords, and watering access.
- Attachment supplies: Use reusable ties, ribbon, green floral wire, or manufacturer-approved clips. Never staple, nail, or screw through a cord.
Layer the Tree in the Right Order
Decorating in layers keeps ornaments and the angel from blocking cords or inner branches. Test every light strand before installation. Inspect cords for fraying, cracked sockets, loose connections, and exposed wire.
Discard damaged strands instead of covering faults with tape. Follow the manufacturer’s limit for strands connected end to end. Mixing incompatible light sets can overload plugs or connections.
Place lights near the trunk and branch tips to create depth. Next, add ribbon or garland before hanging ornaments. Install feature pieces after the base ornaments so you can reserve clear sightlines.
Attach the angel last. However, prepare its power lead and reinforcement point before the upper branches become crowded. This step makes final installation safer and easier.
- Shape the tree: Spread artificial branches or turn the best side of a real tree toward the room. Balance the outline before adding decorations.
- Add and test the lights: Work from the trunk outward. Check for dark sections or obvious horizontal bands.
- Place ribbon or garland: Tuck it into the branches at regular intervals. Make sure it does not pull the tips downward.
- Hang base ornaments: Distribute the main colors from top to bottom. Avoid concentrating one color or finish in a single area.
- Add feature ornaments and texture: Place special pieces where people can see them clearly. Prevent fragile ornaments from touching or rubbing together.
- Set the skirt or collar: Keep it clear of plugs, adapters, and watering access. Do not hide damaged or overloaded connections beneath fabric.
- Attach the angel: Face it toward the main viewing area and secure the mount. Release nearby branches gently to confirm that it remains centered.
Keeping the Angel Straight and Secure
If the topper leans, stop bending the tree’s top branch. Repeated bending can weaken or break it. Instead, reinforce the upper stem or choose a lighter angel.
On an artificial tree, align the main stem with a nearby branch. Bind them gently with a reusable green tie. Then place the topper over the reinforced section.
You can stabilize some hollow cone bases with soft, removable material around the stem. Keep that material away from bulbs and electrical connections. Do not pack the base so tightly that it damages the branches.
For a spring or coil mount, guide the top branch fully into the coil. Do not balance the angel on the first turn. Clip mounts should grip a sturdy branch without crushing wires or scraping flocking.
Fabric ties can prevent the topper from rotating. Tie them firmly but leave enough slack for easy removal. Avoid knots that require cutting near light cords.
Use a stable stepladder rather than a chair, table, or stack of boxes. Ask another adult to steady the tree during installation. Route a lighted topper’s cord down the back and secure it loosely along the trunk.
Lighting and Fire Safety Around the Tree
Use lights, toppers, extension cords, and timers rated for their location. Look for certification from a recognized testing organization, such as UL or ETL. Follow each manufacturer’s instructions when connecting components.
Do not modify a lighted angel or bypass a fuse or safety feature. Never replace the specified bulb with a higher-wattage bulb. Keep cords away from pinched areas beneath stands, furniture, windows, and doors.
Turn off the display before sleeping or leaving home. A timer can handle this task consistently. Keep lights and electrical decorations away from curtains, paper, loose fabric, and other flammable materials.
Older incandescent bulbs produce more heat than LEDs. Give unlit paper and fabric toppers plenty of space around all bulbs. Replace light strands that feel unusually hot or show visible damage.
Water a real tree daily because dry needles and branches ignite quickly. Check the water without pulling cords or shifting the stand. Remove the tree once it becomes dry and brittle.
Pets and young children may pull low ornaments or hanging cords. Secure the tree as needed and move fragile decorations higher. Keep sharp hooks, small parts, and coin batteries out of reach.
Make the Angel Part of the Whole Tree
The most successful angel does not need to be the room’s largest decoration. It needs suitable proportions, a secure mount, and a color or texture repeated elsewhere. Fine details matter up close, but the wings and robe shape control the view across the room.
Step back to the main doorway before calling the tree finished. Check that the angel looks centered, visible, and proportionate. Briefly dim the room lights to compare a lighted topper with the tree lights.
If the crown looks crowded, remove several upper ornaments. Do not add more picks to conceal the problem. A little open space makes the topper easier to see.
A well-chosen Christmas tree angel topper should look settled into the branches rather than balanced precariously above them. Coordinate its palette, install decorations in layers, and reinforce the upper stem when necessary. The finished tree will look cohesive and remain practical to maintain and dismantle.