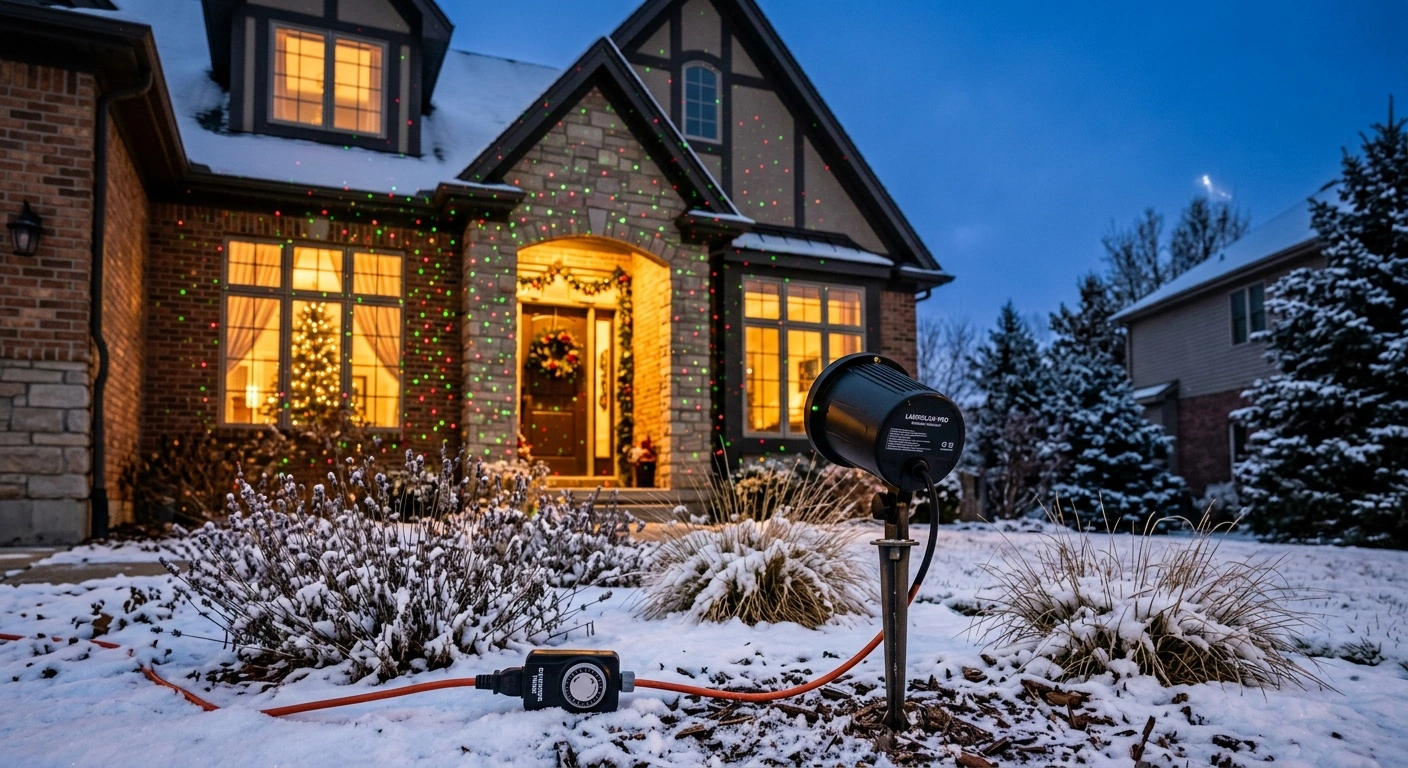
Christmas laser lights quickly cover a wide house facade without putting you on a ladder all weekend. They provide strong street-facing color with fewer clips and cords than traditional roofline displays.
A good projector creates an even light field and uses a housing designed for outdoor exposure. It also includes a mount that holds its position. Poor models often look bright in the center but thin near the edges.
Do not choose a projector based on pattern count alone. Coverage, brightness, and placement matter more. A basic red-and-green laser with a solid stake often outperforms a feature-heavy projector that shifts in the wind.
How to Choose Christmas Laser Lights
Laser dots versus LED image projectors
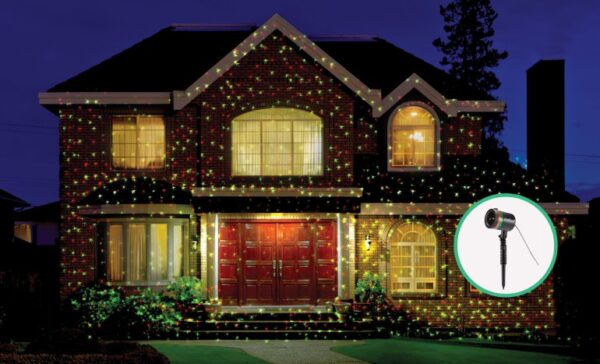
True laser projectors produce crisp points or simple shapes that stay defined over a long throw. They work well on siding, brick, garage doors, shrubs, and mature evergreens. Small points can cover these uneven surfaces without obvious distortion.
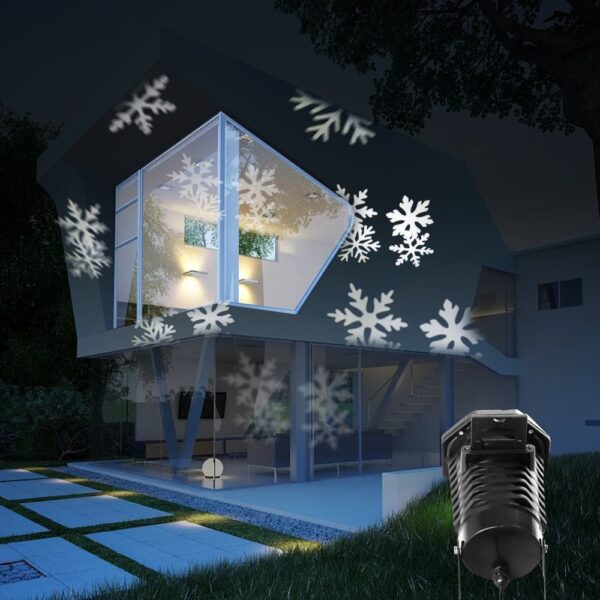
LED image projectors shine light through a slide, film, or patterned lens. This design supports snowflakes, figures, words, and larger moving images. However, those images become softer as the projector moves farther from the wall.
An LED unit may suit a sheltered porch or small wall viewed at close range. A laser usually creates a clearer display from the street.
Do not assume every product called a laser projector contains a laser. Read the product description and manual before buying. Look for the required laser safety label on any true laser product.
The FDA regulates consumer laser products in the United States. Never modify the housing, aiming controls, laser module, or safety features.
Coverage area and throw distance
Coverage describes how much wall or landscaping the light field can reach. Treat advertised coverage figures as estimates because placement affects the final result.
Moving the projector farther away expands the field but spreads the available light across a larger area. The dots may look dimmer or farther apart. Moving it closer increases intensity but may leave upper stories uncovered.
Measure the distance between the likely mounting spot and the house. Then check the projector’s stated beam spread. A narrow field may cover a garage door while missing the eaves.
For a wide or two-story house, consider two modest projectors at controlled angles. This setup often produces more even coverage than one unit operating at its maximum distance.
Brightness and color
Red and green remain practical laser colors for outdoor holiday displays. Green usually appears brighter to the human eye. Red adds warmth and prevents the display from looking like a single-color wash.
Blue can look attractive, but it may appear less prominent on dark siding or dense evergreen foliage. Test each color from the normal viewing distance when possible.
Manufacturers do not always report output in a form that supports direct comparisons. Instead, consider throw distance, nearby lighting, and surface color. White siding reflects well, while dark brick and rough stone may require a shorter throw.
Photographs can exaggerate laser intensity, especially against a dark sky. Judge the projector by how evenly it covers the house and landscaping. Keep all dots on solid surfaces within your property.
Weather rating and cold-weather construction
Choose a projector that the manufacturer specifically rates for outdoor use. An IP rating uses two digits. The first covers resistance to solids, while the second covers resistance to water.
For example, an IP65 enclosure blocks dust and resists water jets. That rating does not allow submersion. Never place a projector in standing water.
Check the entire power system, not just the projector housing. The adapter, extension cord, timer, and connections must support outdoor use. Look for certification from UL, ETL, or another nationally recognized testing laboratory.
Use a GFCI-protected outlet and keep plug connections above standing water. A weather-resistant connection cover can add protection when its instructions permit outdoor use.
Cold weather can stiffen cords and make thin plastic stakes brittle. Choose a metal or reinforced stake for hard soil. On a porch or paved area, use a stable weighted base approved by the manufacturer.
Timers, remotes, and motion controls
A repeating timer lets the display run during set evening hours without daily adjustments. Some models place the timer button on the adapter. Others use a remote control.
Check how the timer responds after a power interruption. Some projectors retain the previous setting, while others reset. The manual should explain the model’s behavior.
A remote adds convenience, but it should not provide the only practical control method. Cold batteries, walls, distance, and poor sight lines can reduce its range. Look for accessible controls on the projector or adapter.
Slow motion usually looks cleaner across a large wall. Fast spinning or flashing can make the display feel busy. A stationary mode also helps with aiming and quiet evening displays.
Ground stakes and other mounting options
A sturdy, adjustable ground stake works well in a lawn or flowerbed. It should resist normal wind and movement in softened soil. Push on the stake shaft or foot point rather than the projector head.
A tabletop base suits indoor displays, covered porches, and frozen ground. Use a wall or deck mount only when the manufacturer supports that installation. Follow its hardware and clearance instructions.
Do not create a mount that blocks ventilation or pinches the power cord. Avoid altering an aiming stop or other safety component.
After installation, tug lightly on the mount and observe it for several minutes. The projector head should remain steady. Confirm that the cable does not sag across a walkway.
Christmas Laser Lights at a Glance
These selections focus on established product lines and useful display types. Manufacturers may revise housings, remotes, timers, and weather ratings without changing the main product name. Confirm the exact model and current manual before ordering.
Seasonal prices change quickly, so the table uses general price tiers. Budget models suit small areas and occasional use. Midrange and premium options often provide stronger mounts, broader coverage, or more controls.
| Pick | Best for | Light style | Price tier | Main drawback |
|---|---|---|---|---|
| Star Shower Motion | Simple red-and-green coverage | Moving or stationary laser points | Budget to midrange | Limited pattern variety |
| BlissLights Spright Compact | Small houses and beginner setups | Red-and-green laser field | Midrange | Versions and included controls may vary |
| LedMall RGB outdoor garden laser projector | Large facades and multicolor displays | Red, green, and blue laser effects | Premium | Higher cost and more setup choices |
| Outdoor-rated LED slide projector | Recognizable pictures on a small wall | Projected LED images | Budget to midrange | Images soften with distance |
| Two matching basic laser projectors | Wide or uneven houses | Overlapping laser fields | Midrange to premium total | Two power runs and careful aiming |
Top Picks by Use Case
Best for simple coverage: Star Shower Motion
Star Shower Motion suits buyers who want the familiar red-and-green dot effect without a large pattern menu. Place it in the yard, adjust the angle, and select moving or stationary light.
This simple design works for a garage, house facade, or group of shrubs. Slow movement looks cleanest across a broad surface with few competing decorations.
From the street, the small points add texture without hiding architectural details. At close range, viewers will see a field of dots rather than a projected picture.
Limited variety remains the main drawback. Product versions and accessory packages may differ, so inspect the current listing and manual. Verify the timer, coverage, weather rating, and included mounting parts.
Best for beginners: BlissLights Spright Compact
The BlissLights Spright Compact line can fit a smaller house, garage door, porch wall, or indoor holiday backdrop. It focuses on a conventional red-and-green field instead of detailed scenes. Its compact housing also simplifies storage.
This projector works best across a controlled area. Start close enough to keep the colors visible. Then move it back until the field reaches the desired edges.
Dark siding may require a shorter placement distance than pale siding. Nearby porch lights can also reduce the apparent brightness.
Packages may include different mounts or controls under similar product names. Confirm the outdoor rating, timer operation, temperature guidance, and laser labeling. Check whether the package includes both a ground stake and tabletop base.
Best for broad color: LedMall RGB outdoor garden laser projector
LedMall’s RGB outdoor garden laser projector line adds blue to the standard red-and-green field. The extra color can fill a large pale facade and coordinate with nearby string lights.
Adjustable patterns and motion provide more control over the finished display. However, simple mixed-color points usually look cleaner from the curb than rapid pattern changes. Reduce the speed and use fewer effects for a calmer result.
Cost and setup complexity create the main tradeoffs. LedMall has sold several projector configurations with different controls and specifications.
Verify the exact model, timer, remote, pattern set, weather rating, and mounting hardware. Also confirm its recognized safety certification and required laser labeling before purchase.
Best for pictures: an outdoor-rated LED slide projector
Choose an LED slide projector for snowflakes, ornaments, figures, or other recognizable images. It can place large pictures on a garage door or sheltered exterior wall. Changing a slide also makes themed displays easier to manage.
For the sharpest picture, aim the projector squarely at a flat surface. A steep angle stretches the image. Excessive distance makes the picture dim and soft.
Textured brick, shrubs, and tree branches break up detailed images. Use dots or broad patterns on those surfaces instead.
LED slide projectors lose more definition over distance than true laser-dot units. Moisture and severe cold can also affect slide mechanisms. Confirm that the housing, adapter, cord, and mount all support outdoor use.
Best for a wide house: two matching basic projectors
Two matching projectors often suit a long ranch house, side-facing garage, or facade divided by deep rooflines. Each unit can cover one section without sitting too far from the house.
Matching models keep the colors and movement consistent. Aim one unit at each half of the facade. Allow only a small overlap in the center.
Heavy overlap creates a bright patch, while a gap makes the display look divided. Use the same motion speed on both units. A stationary setting also works well.
This arrangement requires two secure mounting points and careful cable routing. Follow the circuit limits and all manufacturer instructions. Never daisy-chain equipment unless the manufacturer expressly allows it.
How to Position a Laser Projector Safely
Place the projector low in the yard and aim it level or downward toward the house. Every beam should end on siding, brick, trees, or another solid surface.
Never aim a laser at the sky, roads, vehicles, neighboring windows, or people. Aiming a laser at an aircraft violates federal law and creates a serious safety hazard.
Keep the projector away from children and busy walkways. Someone should not be able to bend over the aperture or look directly into the beam. Never stare into the aperture, even if the light appears weak.
Do not open the laser module or attempt to increase its output. Leave aiming stops, housings, and safety features intact.
Begin setup before dark so you can establish the direction safely. Make final adjustments at dusk. Then inspect the display from the edges of your property.
Confirm that no dots reach roads, windows, neighboring land, or open sky. Recheck the aim after rain, snow, wind, or a ground thaw. Soft soil can shift a stake without making it look loose.
Use outdoor-rated lights, adapters, timers, and extension cords. Look for certification from UL, ETL, or another recognized testing laboratory. Connect the system to a GFCI-protected outlet.
Keep every connection away from puddles and snowmelt. Turn the projector off when you sleep or leave home, or use a reliable timer.
Common Buying and Setup Mistakes
Excess coverage can create as many problems as insufficient coverage. If the field extends beyond the facade, do not let it spill into open sky or neighboring property. Shorten the throw or choose a smaller coverage area.
A bright porch fixture can wash out nearby laser dots. Reposition the projector or reduce unnecessary ambient light before replacing the unit. A small placement change may improve contrast significantly.
Loose extension-cord connections also create trouble. Keep plugs raised and use suitable weather-resistant connection covers. Add a drip loop so water cannot follow the cable into the connection.
Do not wrap a wet electrical connection in household plastic. Disconnect the power and allow all components to dry before inspection.
Finally, judge the display from its normal viewing position. Dots may look sparse from three feet away but form a cohesive field from the sidewalk. Make placement adjustments from the street or property line.
How to Create a Finished Holiday Display
Laser coverage should support the house’s shape rather than compete with every other decoration. A restrained warm-white roofline defines the facade. Red-and-green points can then fill the larger wall areas.
Add one focal point near the entrance, such as a wreath or lit garland. This gives the eye a clear resting place and prevents the display from feeling scattered.
Limit competing motion. If the projector moves, keep nearby string lights steady. If the roofline twinkles, use a stationary laser field.
Balance the colors across the property. Red and green pair well with warm-white porch lighting. RGB effects can complement cool-white lights when you use the blue sparingly.
Well-positioned Christmas laser lights should cover the intended surfaces cleanly and remain secure in changing weather. Check the display from the front walk and across the property. Most importantly, keep every beam contained on your property.