Looking to infuse rustic charm into your holiday décor? Discover how to make a wooden Christmas tree—a festive, eco-friendly DIY that blends natural texture with seasonal cheer. Whether you’re aiming to create a porch showpiece, a sustainable tree alternative, or a fun family project, building a wooden Christmas tree adds personality and warmth to your space. This step-by-step guide shares everything you need—from design inspiration and material lists to decorating ideas and safety tips—to help you craft the perfect wooden tree for indoors or outdoors.
Choosing a Style for Your Wooden Christmas Tree
Before building, decide on a standout style for your space. When planning how to make a wooden Christmas tree, factor in your décor theme and available room. Choose from three popular designs that suit a wide range of styles and sizes:
- Rustic Pallet Tree: Ideal for farmhouse or cottage interiors. Constructed from reclaimed pallets, stained or painted to match your color scheme.
- Freestanding Triangle Tree: Perfect for front lawns, patios, or porches. Built with slatted wood forming a triangular frame.
- Wall-Mounted Slat Tree: A space-saving vertical option mounted directly to walls. Crafted from horizontal planks arranged to mimic a tree silhouette.
Outdoor trees benefit from moisture-resistant woods like cedar or pressure-treated lumber. For indoor projects, softwoods like pine or spruce are easier to cut, finish, and personalize. Reclaimed barn wood delivers extra character and a lived-in look.
Materials and Tools You’ll Need
Once you’ve picked your style, gather all supplies to streamline your build. For a basic freestanding triangle tree measuring four feet, you’ll need the following:
- 1×4” wood planks (cedar or pine)
- Wood screws or finishing nails
- Electric drill or screwdriver
- Measuring tape and carpenter’s square
- Handsaw or circular saw
- Sandpaper (80–120 grit) or electric hand sander
- Paint or wood stain (non-toxic for indoor use)
- Wood glue (for extra strength, optional)
- Safety gear: gloves, eye protection
Adding lights? Stock up on outdoor-rated LED string lights, weatherproof extension cords, and cable clips to secure the setup. LED mini-lights are energy-efficient and safe—they emit minimal heat and easily fit around narrow slats or edges.
How to Make a Wooden Christmas Tree: Step-by-Step
Follow these instructions to learn exactly how to make a wooden Christmas tree with a freestanding, slatted triangle design that pairs beautifully with both rustic and modern décor.
Step 1: Design and Cut the Triangle Frame
Start by measuring and cutting your main structural planks. For a 4-foot-tall tree:
- Two side boards: 48″ in length with 30° miter cuts at one end
- Base board: 24″ flat cut
Form a triangle by connecting the side boards at the top and attaching both to the base. Use corner brackets or screw directly at the joints, checking all angles with a carpenter’s square for alignment.
Step 2: Install Horizontal Slats
Cut and arrange wooden slats to fill the inside of the triangle. Begin with a 22” plank at the base and decrease each slat’s length by 2” as you move upward. You’ll likely need 10 to 12 slats.
Secure each slat from the rear using screws or finishing nails. Maintain even spacing between slats, or create a staggered pattern for more visual interest. Using reclaimed wood adds texture and variation.
Step 3: Sand, Stain, and Seal
Thoroughly sand all surfaces, focusing on exposed edges to prevent splinters. For finishes, choose from natural stains or holiday tones like red, green, or whitewash. Apply water-resistant sealant if placing the tree outdoors. A lightly stained finish reflects light better than overly dark wood when adding lights later.
Step 4: Decorate With Lights and Ornaments
Wrap LED light strands neatly around the triangle frame or thread them through the interior slats. For outdoor use, fix lights in place with zip ties or cable clips to avoid shifting in the wind. Indoors, battery-powered fairy lights offer a cordless and sleek setup.
Add your favorite seasonal decorations—pinecones, ribbons, bells, or weatherproof baubles. A sturdy bracket at the tree’s top point allows for easy attachment of a star, bow, or illuminated topper.
Where to Display Your Wooden Christmas Tree
Now that you’ve mastered how to make a wooden Christmas tree, choose a display location that highlights its handcrafted charm and lighting brilliance. Consider these ideas:
- Front Porch: Position the tree near your entry steps or railing. Pair with a doormat, wreath, and lanterns for a picture-perfect welcome.
- Yard Display: Place on level ground using a wood platform or garden stakes for stability. Program LED lights to auto-illuminate in the evening.
- Indoor Entry: Complement your main tree with a rustic accent in the foyer. Use a tree skirt and surround it with wrapped boxes for a festive look.
- Mantelpiece Accent: Make miniature versions (1–2 ft) as decorative pieces on mantels or window sills. Surround with garlands or faux snow.
Indoor settings should use GFCI outlets if possible and always tuck cords behind furnishings to prevent tripping. Smart plugs or timers offer added safety and convenience.
Family Activities and Creative Add-Ons
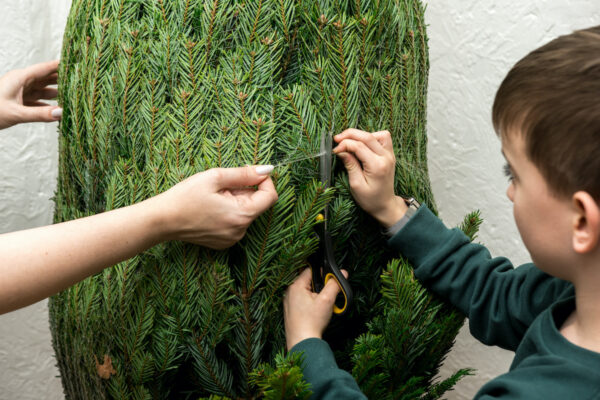
Making your own wooden Christmas tree can be a fun holiday tradition. Let each family member decorate a slat with paint, stencils, or messages. Over the years, your tree becomes a treasured keepsake.
To personalize even further, try these creative ideas:
- Chalkboard Panels: Paint one or more slats with blackboard paint and add countdowns or seasonal messages.
- Foldable Frames: Create two identical triangle structures and connect them with hinges so your tree folds flat after the holidays.
- Battery Lights: For smaller indoor trees, opt for warm micro-lights on an automatic timer to simplify setup.
Seal your finished tree with clear polyurethane if you plan to reuse it outdoors year after year. Store indoors in a dry place to prevent any damage.
Create a Festive Focal Point with Style
Knowing how to make a wooden Christmas tree empowers you to create lasting holiday décor with heartfelt charm. Whether evoking rustic nostalgia or embracing clean Scandinavian lines, wooden trees offer endless customization. Cluster multiple trees of varied sizes for dramatic indoor displays, or spotlight a single statement piece in your yard using solar uplighting.
Not only does this DIY project elevate your seasonal décor, but it also brings family and function together. With creativity, care, and a few basic tools, your handcrafted tree will be a joyful centerpiece for years to come.